Friday 23 December 2016

Dehydrate activity in BPEL to commit transaction

You can understand the concept of dehydrate activity with a typical use case.

One of my soa process was having following requirement

First get the data from client and insert it in to table 

then call a procedure which will use this data you have inserted in the table.


Challenge- When we call an apps procedure/package we use a non xa data source as all the transaction is handled in EBS

The error that was coming in this use case was that for an insert activity with non xa datasource the commit was not happening

which was throwing error in the procedure call as no data found in the table.


Reason - The reason for the same was that since we were using a non xa data source after inserting the data in to staging table the soa process was not commiting it hence it was not available to the procedure as all the process was going on in a single transaction.

So my process was looking something like this


Now in order to commit the insert we used this dehydrate activity which complete one transaction and start another hence the records get committed in the staging table. So after inserting the activity my process was able to achieve the functionality i was looking for.


though the functionality is achieved this is not a good practice to design the process as dehydrate activity commits the transaction and ideally a synchronous process should execute in a single transaction.

This can be better understood by following example.

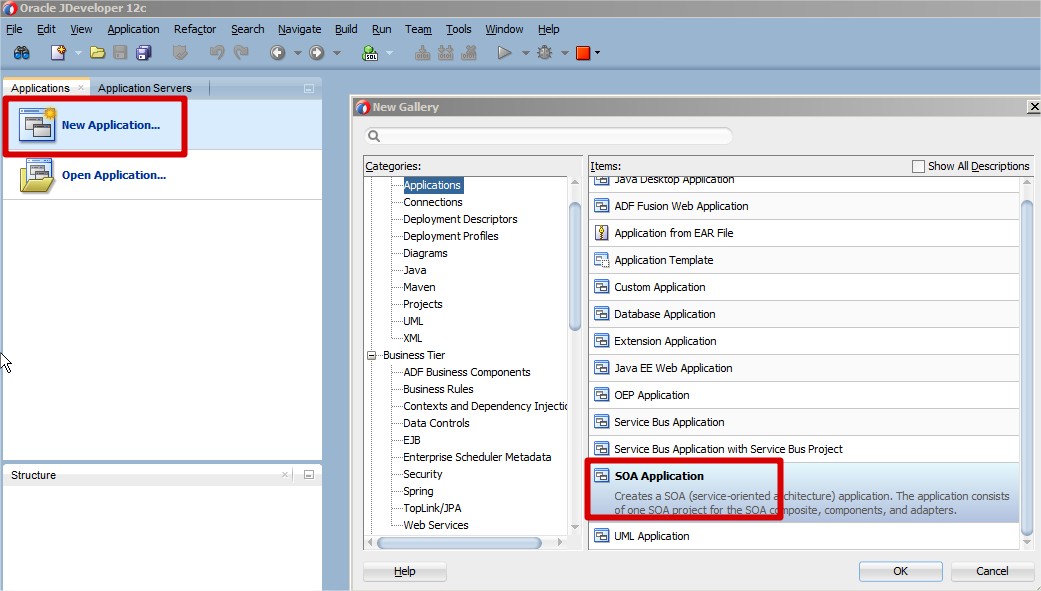
Create a simple synchronous bpel process and use a dehydrate activity 


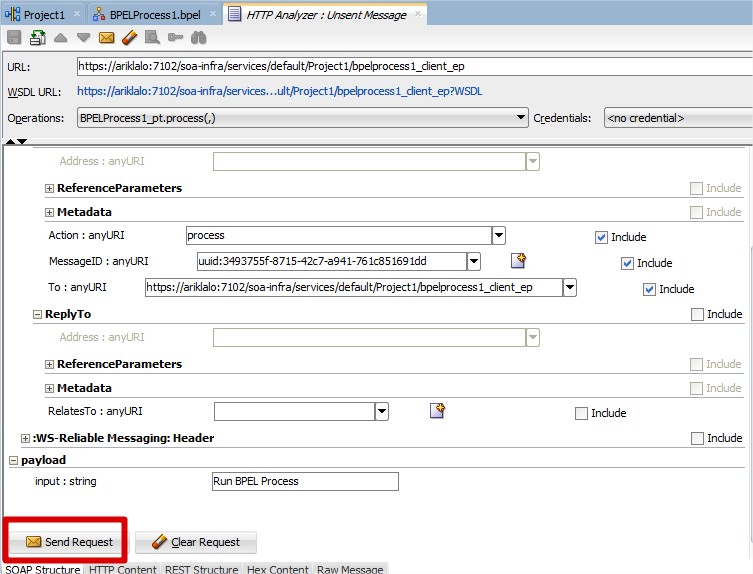
Now if you will execute the process you will get the following error


java.lang.Exception: oracle.sysman.emSDK.webservices.wsdlapi.SoapTestException: Client received SOAP Fault from server : Waiting for response has timed out. The conversation id is null. Please check the process instance for detail. at oracle.sysman.emas.model.wsmgt.WSTestModel.invokeOperation(WSTestModel.java:813) at oracle.sysman.emas.view.wsmgt.WSView.invokeOperation(WSView.java:385) at oracle.sysman.emas.view.wsmgt.WSView.invokeOperation(WSView.java:302) at sun.reflect.NativeMethodAccessorImpl.invoke0(Native Method) at sun.reflect.NativeMethodAccessorImpl.invoke(NativeMethodAccessorImpl.java:39) at sun.reflect.DelegatingMethodAccessorImpl.invoke(DelegatingMethodAccessorImpl.java:25) at java.lang.reflect.Method.invoke(Method.java:597) at com.sun.el.parser.AstValue.invoke(AstValue.java:187) at com.sun.el.MethodExpressionImpl.invoke(MethodExpressionImpl.java:297) at org.apache.myfaces.trinidadinternal.taglib.util.MethodExpressionMethodBinding.invoke(MethodExpressionMethodBinding.java:53) at org.apache.myfaces.trinidad.component.UIXComponentBase.broadcastToMethodBinding(UIXComponentBase.java:1415) at org.apache.myfaces.trinidad.component.UIXCommand.broadcast(UIXCommand.java:183) at oracle.adf.view.rich.component.fragment.ContextSwitchingComponent$1.run(ContextSwitchingComponent.java:92) at oracle.adf.view.rich.component.fragment.ContextSwitchingComponent._processPhase(ContextSwitchingComponent.java:361) at oracle.adf.view.rich.component.fragment.ContextSwitchingComponent.broadcast(ContextSwitchingComponent.java:96) at oracle.adf.view.rich.component.fragment.UIXInclude.broadcast(UIXInclude.java:103) at oracle.adf.view.rich.component.fragment.ContextSwitchingComponent$1.run(ContextSwitchingComponent.java:92) at oracle.adf.view.rich.component.fragment.ContextSwitchingComponent._processPhase(ContextSwitchingComponent.java:361) at oracle.adf.view.rich.component.fragment.ContextSwitchingComponent.broadcast(ContextSwitchingComponent.java:96) at 

This is because the dehydrate activity has forced dehydration and caused the process to commit , however a synchronous process should commit in a single transaction.

If you have a use case as mentioned above it is always better to go ahead and make your process as asynchronous process.

In case of database transaction using local data source this might work in case of a synchronous process but is still not a good practice to use dehydration point in a synchronous process.

Tuesday 20 December 2016

Error fetching web service - Not a valid SOAP Content-Type: text/html or application/xml

I have a web service (actually more than one) that is being called by java codes and by PL-SQL packages, in the production environment of the company everything is running perfectly. 
But we are creating another server to migrate. It was passed all to the other server but when calling services by java gives the following error:

Nested exception: HTTP transport error: javax.xml.soap.SOAPException: java.security.PrivilegedActionException: oracle.j2ee.ws.saaj.ContentTypeException: Not a valid SOAP Content-Type: text / html
The service is working, if I enter directly through the url in the browser, it merges, when it is called by the PL-SQL packages it be works.
No code has been changed from environment to environment. I think it might be some configuration on the server that is causing the exception. 
And the error is happening in the call of any of the web services.


Solution:- 

Probably some detail of configuration. 
A tip that can help you. 
1) If soap 1.1 is the Content-Type, it must be text / xml. 
2) If soap 1.2 the Context-Type must be application / soap + xml

Probably your case should be 1.1 soap, but the client is 
sending a message with content-type wrong text / html, and 
the correct would be text / xml.


If you are invoking third party services and getting above error in SOA:

Create on variable in BPEL:  Content-Type and assign below value as respective

for soap 1.1 :-  'text/xml'
      soap1.2 :- 'application/soap+xml'
and then attched Content-Type variable into invoke Header Properties.

Saturday 10 December 2016

FTP Adapter Configuration for SFTP Communication in SOA using public key authentication process

Target : To establish SFTP communication between the SOA server and the SFTP server and configure FTP Adapter using public key authentication process.


Solution :

1. Login to the SOA server
cd ~ ( This will navigate to the home location of the user )
cd .ssh

2. Execute the below command. This will generate the public and private key
ssh-keygen

3. After entering the above command, you would be asked the file where the keys would be saved.
 Accept the default values and enter. Now, the identification will be saved at the below location
Private key location : /<home location of the user>/.ssh/id_rsa
Public Key Location : /<home location of the user>/.ssh/id_rsa.pub

4. Copy the public key of the SOA host ( /<home location of the user>/.ssh/id_rsa.pub ) to the 
known_hosts/authorized keys of the SFTP server. This can be done by copying the content of 
the pub key file into the authorized_keys file. 
( If not sure how to perform this, please contact the system admin )

5. On the SFTP server, make sure you have the required privileges on the authoroized_keys

6. Now test the SFTP communication. This can be done by the following steps on the SOA server
sftp <sftp_user>@SFTPHOST

Alternatively, You can use the below command if the SFTP is running on a different port apart from the 
default one :
sftp -vvv -oPort=<port number> <user>@<SFTP HOST>

7. When you do this for the first time, you will be prompted for confirmation. Type "yes"

8. This completes the SFTP communication between the SOA server and the SFTP host.

9. Once the communication is established, now configure the adapter :
Update the FTP adapter connection pool which you are using with the below parameters :
o Authentication type : publickey
o Host : <SFTP Host Name>
o Port : <SFTP Port>
o Private key file : /<user's home>/.ssh/ id_rsa
The above is the private key path which has been created in the 1s step.
o Username : <SFTP User>
o useSFTP : true

10. Save and activate the changes. Update the deployment FTP Adapter.

Wednesday 7 December 2016

Create and run a SOA Composite with a simple BPEL process on 12c Development environment

In this post I will show how to create and deploy your composite with a simple BPEL process. The main goal is to describe the deployment process in the local SOA environment. The steps are very simple and almost the same as in 11g version.
If you haven’t yet install the environment or started the server, go to my previous post Oracle SOA Suite 12c Installation.
For this post I’ve create a SOA application with new project, and selected a BPEL component:
SOA 12c New Application
Create SOA Application - Step 2 of 3
Create SOA Application - Step 3 of 3
I’ve added a simple assign activity for the example:
Edit Assign

Now we can deploy the process:
  1. Right click the project and deploy it:Deploy 1
    Deploy 3

    Deploy 4

Last thing is to run the new process and monitor it. You can do that directly from the jdeveloper, or enter the EM and run it from there:
From Jdeveloper:
  1. Go to the Application Server tab, drill down from the SOA folder until you will reach your project and its ws file.
    Right click it and “Test Web Service”:Test BPEL
  2. Enter the payload parameter and “Send Request”Test BPEL 1

From EM:

  1. open EM from your local host and login:EM
  2. Find your process and test it:Test BPEL 2
  3. When done, you can go to “Flow instances” tab and monitor the instances.Test BPEL 3

Good Luck

Oracle SOA Suite 12c Installation

With the latest version of SOA/BPM Suite 12c (12.1.3), Oracle provides installations in 2 modes: Development and Production.
In the Development mode, and unlike previous versions, with 12c you can choose to download, install and run a complete environment on your local machine. All with only 1 installation file.
The production mode, on the other hand, includes full sets of components that allows you to set a production environment (or TEST/UAT).
In this post I will describe in few steps, how to download and install Oracle SOA suite 12c in development mode.
Please follow the next step in order to complete you Development environment preparation:
Download and install
  1. Download SOA Suite 12c:
    http://www.oracle.com/technetwork/middleware/soasuite/downloads/index.html?ssSourceSiteId=ocomen
    Choose you platform and click download:
    Download SOA Suite 12c
  2. Run the installation:
    You will first have to download and install Java SE Development Kit 7 (if not done already) –
    http://www.oracle.com/technetwork/java/javase/downloads/jdk7-downloads-1880260.htmlWhen done, run the command:
    C:\Java\jdk1.7.0_25\bin\java -jar fmw_12.1.3.0.0_soa.jar
  3. When the wizard starts, press next in the first page:wizad1
  4. Choose your Middleware Home:wizard2
  5. Verify that all prerequisite check succeeded, and press next:wizard3
  6. Press install:wizard4
  7. Verify that the installation completed successfully and press finish:wizard5

Start JDeveloper and Configure WL Domain
  1. Start Jdeveloper:
    jdeveloper
  2. Choose the default option:
    start Jdev
  3. The next thing, after starting jdeveloper, is to configure a WL domain. This step will actually create a local environment with Admin Server that will allow you to deploy and run your prcessess.
    Go to the “Application Server” tab (Window -> Application server), right click on the IntegratedWebLogicServer and choose “Create Default Domain”:
    Create Domain
  4. In the properties window fill the Admin Id and password (you can leave other fields with the default values), and press OK.
    The process will take few minutes:
    Create Domain 2
  5. In the end you will see a confirmation in the log:
    Create Domain 3

Start the SOA server
  1. Go to the “Application Server” tab (Window -> Application server), right click on the IntegratedWebLogicServer and choose “Start Server Instance”:
    start server
  2. When the server is up you will see the next line in the log:
    start server 2

That’s it. You can now start with your development.
Good Luck

connection break up while connecting to remote FTP server.

ORABPEL-11445
The SSH API threw an exception.
If you get such type of error while connecting to remove FTP server then do the following..
1. Set the following two partnerlink properties in the BPEL project bpel.xml file:
<property name="useJCAConnectionPool">true</property>
<property name="cacheConnections">false</property>
After these changes redeploy the BPEL project.
2. On the BPEL server set $ORACLE_HOME/j2ee/<bpel>/application-deployments/default/FtpAdapter/oc4j-ra.xml
keepConnections config-property for the FTP adapter connector-factory being used to this:
<config-property name="keepConnections" value="false">
Restart the system and test it.
Adding connection pool=private for performance tuning.
<connection-pooling use="private">
<property name="waitTimeout" value="300" />
<property name="scheme" value="fixed_wait" />
<property name="maxConnections" value="50" />
<property name="inactivity-timeout-check" value="all" />
<property name="minConnections" value="5" />
<property name="inactivity-timeout" value="50" />
</connection-pooling>

Tuesday 6 December 2016

Save A Processed File On An Archive Directory

Archiving a file when using FTP Adapter is very important. From some reason a file might be poled but not processed.
To overcome it, there is an option to save a backup file, after the file was polled.
When using FtpAdapter, you can choose to save a backup file on the remote FTP server, or on the local server.
In this post I will explain how to do it.
First option – Save the file on the FTP server
Follow the next steps:
  1. Create an archive directory on the remote FTP server.
  2. A property on the FtpAdapter called UseRemoteErrorArchive is by default set to true.
    If from any reason it’s set to false, just change it (on the .jca file as being described in the next point)
  3. Add the property PhysicalErrorArchiveDirectory and put the full path of the archive file directory you created on point 1.
    There are 2 ways to do it:
    First way: On the EM right click your process name (under soa-infra/”partition name”) -> Choose “Service/Refernece Properties” -> Choose your Service name(The name of the
    FtpAdapter) -> Go to Properties tab-> Click Add -> Choose PhysicalErrorArchiveDirectoryand put in the value the directory path -> Save.
    Second way: Go to your project on the JDeveloper -> Enter the file “FtpAdapter name”.jca -> Add the property as follows:
     <property name=”PhysicalErrorArchiveDirectory” value=”/archive”/>Redeploy the project 
Second option – Save the file on the local server
Follow the next steps:
  1. Create an archive directory on the local server
  2. Add the two following properties –  UseRemoteErrorArchive, PhysicalErrorArchiveDirectory and set them as follows:
    <property name=”UseRemoteErrorArchive” value=”false”/>
    (Can be set only from .jca file as described in First option point 3)
    <property name=” PhysicalErrorArchiveDirectory ” value=”/archive”/>
    (Can be set in both ways as described in First option point 3)
  3. Save and Redeploy your project

Solve error 530 user

Below is a description of the problem & solution on the weblogic side, assuming there’s no problem with FTP server (connection to FTP server is possible from other machines…)
530 user error can happen because there is a problem with validating one of the parameters: host/user name/password
Possible Solutions:
Change one of the parameters in the FtpAdapter property under Deployments on the Weblogic console:
(For each attribute’s change, need to press the Enter key)
  1. Host: replace IP with host name
  2. User name/ password: write it manually (no copy paste)
  3. Update the FtpAdapter: WL home->Deployments->check the FtpAdapter checkbox->click on the ‘Update’ button
If connection error is still raised you might need to delete and create a new connection.

‘Put’ operation failed due to a stale connection

You are getting the following error when trying to execute FTP connection using FtpAdapter on 11g:
Exception occured when binding was invoked. Exception occured during invocation of JCA binding: “JCA Binding execute of Reference operation ‘Put’ failed due to…….A stale Connection Factory or Connection Handle may be used”
The cause of the problem:
You performed a redeployment  to the FtpAdapter in the WebLogic server.
During the redeployment there are already existing connection in the connection pool, that are being managed by the JCA ConnectionManager.
The WebLogic server doesn’t inform the connection pool about the new change (can be seen in weblogic-ra.xml). So now, Because there are already existing connections within the pool, they become stale

To solve this error:
Perform Update and not Redeploy to the FtpAdapter (Updates the weblogic-ra.xml):
  1. Go to Weblogic console
  2. Click on Deployments
  3. Click on FtpAdapter
  4. Modify and Save your new setting
  5. Click on Deployments
  6. Mark the FtpAdapter checkbox
  7. Click the Update button
  8. Choose “Update this application in place with new deployment plan changes. (A deployment plan must be specified for this option)”
  9. Click Finish

FTP Operations Are Not Working

I’ve noticed something very interesting in the log file when the ‘GET’ operation stopped working (Poll files from remote server).
I found some errors like:

BINDING.JCA-11007
No Data to process
BINDING.JCA-11430
Error in listing files in the remote directory.
Unable to list file in remote directory.
Please make sure that the ftp server settings are correct
Caused by: BINDING.JCA-11426
Unable to enter passive mode
File Adapter testTab PollWork::run exiting, Worker thread will die
Digging into it made me understand that the log will not always direct me to the solution and solve my problem.
I thought about posting here some of the reasons that might cause the ‘GET’ operation for stop working (might help also for ‘PUT’ operation).
I really hope  some of the solutions or explanation can help you. I will try add more details in the future if I will encounter other problems.
I’ve divided it into local & remote issues:
On the remote server:
  1. The permissions on the remote server changed and you can’t poll files
  2. There are too many files in the polling directory.
    FTP adapter work in that way, that it first lists all the existing files, and in the end it polls the relevant file.
    (In that way an incoming new file will not be taken during the polling operation)
    If you have a timeout limitation, the FTP adapter will not have sufficient time to poll the required file.
  3. The polling directory is not correct.
    There might be a mapping between the home directory on the remote server to your local network.
On the local server:
  1. Verify you don’t have a process with old version that is still active
  2. On the JNDI connection (WL console) enter manually the remote server details (host/user/password).
  3. Verify you redeploy the FtpAdapter correctly. For most cases you need to update the deployment, as I explained in my post: ‘Put’ operation failed due to a stale connection.
  4. After updating the FtpAdapter/JNDI connection, enter it again and verify the updated data exist.