Showing posts with label Weblogic. Show all posts

Monday, 8 January 2018

Changing the port of SOA server using wlst

Here we will see , how to change the port of soa server offline using wlst commands.
Start the WLST
Login to your unix box and navigate to your bin folder and run the command.
[testuser@soaserver]$ cd /u01/oracle/SOAInstall/soa/common/bin
[testuser@soaserver]$ ./wlst.sh
wls:/fmw_domain/serverConfig>connect(‘username,’pwd’, ‘hostname:7001’)
wls:/fmw_domain/serverConfig>readDomain(“/u01/oracle/SOAInstall/user_projects/domains/SOAdomain”)
wls:/fmw_domain/serverConfig>cd(“Servers/AdminServer”)
wls:/fmw_domain/serverConfig> setListenPort(7002)
wls:/fmw_domain/serverConfig>updateDomain()

Changing admin password of oracle weblogic server

Most of the times we use to forgot the admin passwords of weblogic server.
Here we will discuss how to change the weblogic password.
First shutdown your weblogic admin and managed server’s.
Set up the environment variables.
export MW_HOME=/u01/app/oracle/middleware
export DOMAIN_HOME=$MW_HOME/user_projects/domains/SOAdomain
Rename the Data folder.
$DOMAIN_HOME/servers/AdminServer/data
$DOMAIN_HOME/servers/AdminServer/olddata
Reset the password using the following command.
$ cd $DOMAIN_HOME/security
$ java weblogic.security.utils.AdminAccount <username> <newpassword>
Update the boot properties file withe new password.
$DOMAIN_HOME/servers/AdminServer/security/boot.properties
Start the WebLogic domain.
$DOMAIN_HOME/bin/startWebLogic.sh
Once the server started , login with your new password.

Creating a JMS queue in oracle weblogic server 12C

In this post we will see how to create a JMS queue in weblogic server.
JMS queue in weblogic server will associate with some other additional resources.
A JMS server implements the JMS infrastructure in weblogic server. Destinations like queues , topics can be targeted to weblogic server instance that has a JMS server configured.
JMS Server
A JMS server acts as a management container for resources within JMS modules. A JMS server is required in order to create a JMS module.
JMS Module
A JMS module is a definition which contains JMS resources such as queues and topics. A JMS module is required in order to create a JMS queue.
Subdeployment
JMS modules are targeted to one or more WLS instances or a cluster. Resources within a JMS module, such as queues and topics are also targeted to a JMS server or WLS server instances. A subdeployment is a grouping of targets. It is also known as advanced targeting.
Connection Factory
A connection factory is a resource that enables JMS clients to create connections to JMS destinations.
JMS Queue
A JMS queue (as opposed to a JMS topic) is a point-to-point destination type. A message is written to a specific queue or received from a specific queue.
Lets start with configuration steps.
Creating a JMS server
For creating JMS server, login to your weblogic server console .
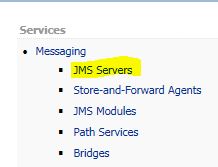
Go to Services -> Messaging -> JMS Servers
jms1.JPG
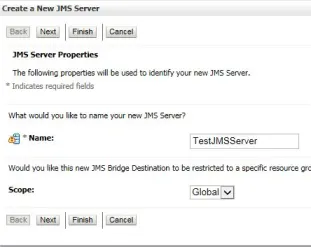
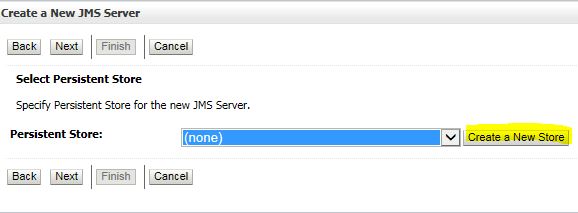
Click on New to create a JMS server . Enter the name and click on Next , For persistent store click on “Create a New Store”.
jms2jms3per
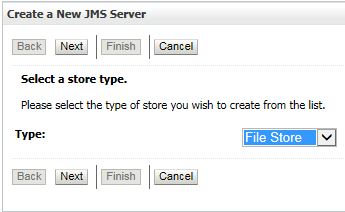
Select the Type as “File Store” and click on Next.
jms3
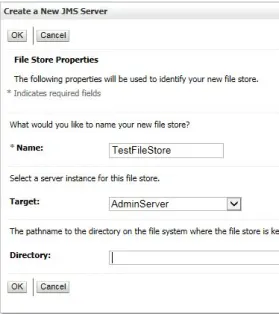
Enter the name and Target to “Admin Server” and click on Ok to finish the file store.
jms4
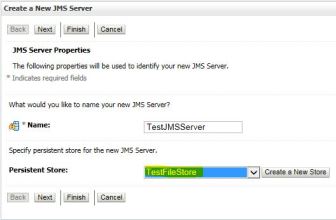
Now it will take you to JMS server configuration window, select the persistent store as “TestFileStore” which we have created above and click on Next.
jms5
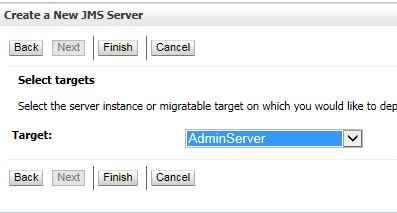
Select the Target as “Admin Server” and click on Finish button.
jms6.JPG
You can see that JMS server is created and targeted to Admin server.
jms7
Creating a JMS Module
Go to Services -> Messaging -> JMS Modules
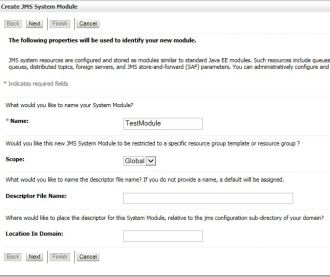
Click on New to create a new JMS module, provide the name and click on Next.
jms8.JPG
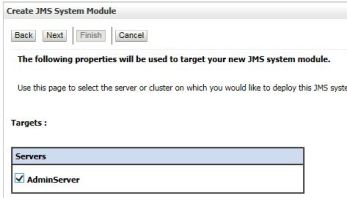
Select the Target as “Admin Server” and click on Next.
jms9.JPG
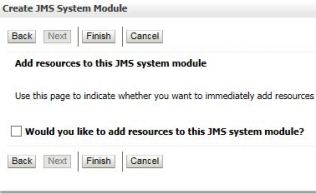
Click on Finish button to complete the set up for JMS module.
jms10.JPG
Creating a SubDeployment
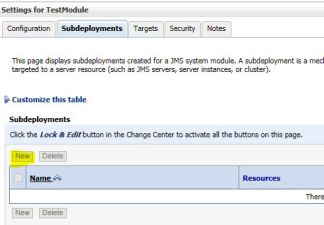
Now open your newly created JMS module (TestModule) and go to “SubDeployments” tab.
Click on New to create a new sub deployment.
jms11.JPG
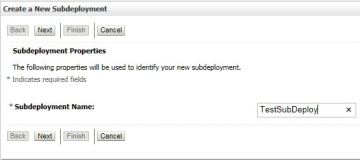
Enter the name and click on Next.
jms12
Select the Target as “TestJMSserver” and click on Finish button.
jms13.JPG
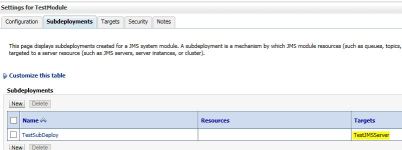
Now you can see that your Subdeplyment created and targeted to JMS server.
jms14.JPG
Creating a Connection Factory
Go to Services -> Messaging -> JMS Modules
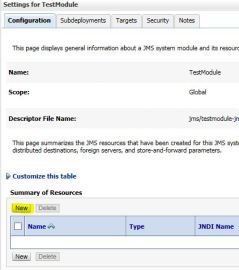
Now open your newly created JMS module (TestModule) and click on New to create a new connection factory.
jms15.JPG
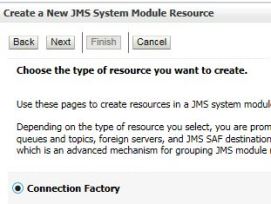
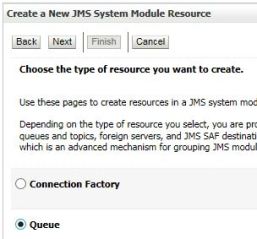
Select the radio button “Connection Factory” and click on Next.
jms16.JPG
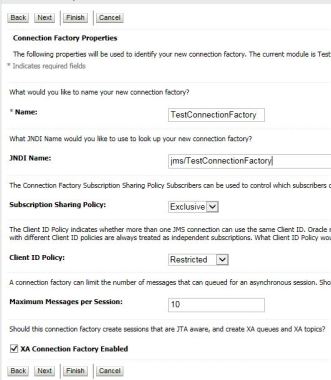
Provide the name and JNDI name click one Next.
jms17.JPG
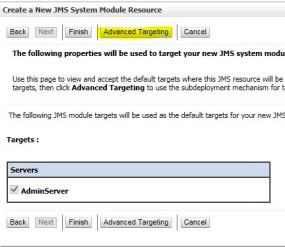
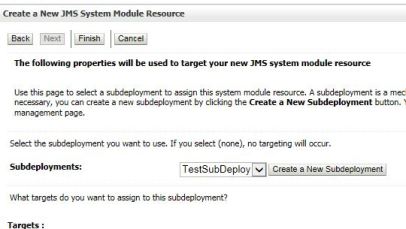
In targets page , click on “Advanced Targeting” option to target to the subdeployment we have created earlier.
jms18
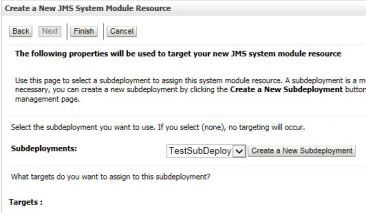
Select the Subdeployment (TestSubDeploy) and click on Finish.
jms19.JPG
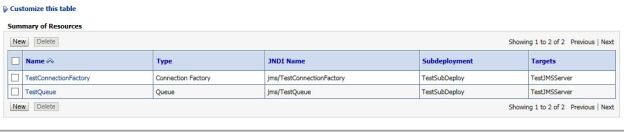
Now you can see the connection factory is created and targeted to the TestJMSServer.
jms20.JPG
Creating a JMS Queue
Go to Services -> Messaging -> JMS Modules
Now open your newly created JMS module (TestModule) and click on New to create a new Queue.
jms21.JPG
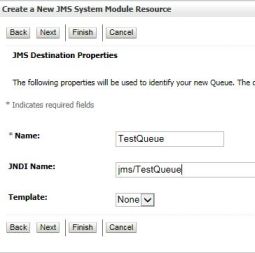
Provide the queue name and JNDI name and click on Next.
jms22.JPG
Select the Subdeployment (TestSubDeploy) and click on Finish.
jms23.JPG
Now you can see the queue is created and targeted to the TestJMSServer.
jms24.JPG
JMS queue set up is complete and it is ready to use.

Creating Data source and DB adapter outbound connection pool using WLST

In this post we will see how to create a data source , DB adapter outbound connection pool and redeployment using wlst scripts.
Lets look at the script which creates both DS and DB adapter connection pool and redeployment.
import time
# admin server url
url = ‘t3://localhost:7001’
# username to connect to the admin server
username = ‘weblogic’
# password to connect to the admin server
password = ‘welcome1’
# the name for the EIS
eisName = ‘eis/db/myDS’
# the admin or managed server to target where the DbAdapter is deployed
serverName = ‘AdminServer’
#nmServerName = ‘soa_server1’
# the name for the data source
dsName = ‘myDS’
# the JNDI name for the data source
jndiName = ‘jbdc/myDS’
# the database url for the data source
dbUrl = ‘jdbc:oracle:thin:@localhost:1522:SOAORA’
# the database user
dbUser = ‘soa12c_soainfra’
# the database password
dbPassword = ‘welcome_1’
# the database driver to use
dbDriver = ‘oracle.jdbc.xa.client.OracleXADataSource’
# the host where node manager is running
#nmHost = ‘localhost’
# the port to connect to node manager (5556 is default for plain mode)
#nmPort = ‘5556’
# the user to connect to node manager
#nmUser = ‘weblogic’
# the password to connection to node manager
#nmPassword = ‘welcome1’
# the name of the weblogic domain
domain = ‘soa12c_domain’
# don’t change the below ones
uniqueString = ”
appName = ‘DbAdapter’
moduleOverrideName = appName+’.rar’
moduleDescriptorName = ‘META-INF/weblogic-ra.xml’
#
# method definitions
#
def makeDeploymentPlanVariable(wlstPlan, name, value, xpath, origin=’planbased’):
try:
variableAssignment = wlstPlan.createVariableAssignment(name, moduleOverrideName, moduleDescriptorName)
variableAssignment.setXpath(xpath)
variableAssignment.setOrigin(origin)
wlstPlan.createVariable(name, value)
except:
print(‘–> was not able to create deployment plan variables successfully’)
def main():
uniqueString = str(int(time.time()))
#
# Create a JDBC Data Source.
#
try:
print(‘–> about to connect to weblogic’)
connect(username, password, url)
print(‘–> about to create a data source ‘ + dsName)
edit()
startEdit()
cmo.createJDBCSystemResource(dsName)
cd(‘/JDBCSystemResources/’ + dsName + ‘/JDBCResource/’ + dsName)
cmo.setName(dsName)
cd(‘/JDBCSystemResources/’ + dsName + ‘/JDBCResource/’ + dsName + ‘/JDBCDataSourceParams/’ + dsName)
set(‘JNDINames’,jarray.array([String(jndiName)], String))
cd(‘/JDBCSystemResources/’ + dsName + ‘/JDBCResource/’ + dsName + ‘/JDBCDriverParams/’ + dsName)
cmo.setUrl(dbUrl)
cmo.setDriverName(dbDriver)
cmo.setPassword(dbPassword)
cd(‘/JDBCSystemResources/’ + dsName + ‘/JDBCResource/’ + dsName + ‘/JDBCConnectionPoolParams/’ + dsName)
cmo.setTestTableName(‘DUAL’)
cd(‘/JDBCSystemResources/’ + dsName + ‘/JDBCResource/’ + dsName + ‘/JDBCDriverParams/’ + dsName + ‘/Properties/’ + dsName)
cmo.createProperty(‘user’)
cd(‘/JDBCSystemResources/’ + dsName + ‘/JDBCResource/’ + dsName + ‘/JDBCDriverParams/’ + dsName + ‘/Properties/’ + dsName + ‘/Properties/user’)
cmo.setValue(dbUser)
cd(‘/JDBCSystemResources/’ + dsName + ‘/JDBCResource/’ + dsName + ‘/JDBCDataSourceParams/’ + dsName)
cmo.setGlobalTransactionsProtocol(‘TwoPhaseCommit’)
cd(‘/JDBCSystemResources/’ + dsName)
set(‘Targets’,jarray.array([ObjectName(‘com.bea:Name=’ + serverName + ‘,Type=Server’)], ObjectName))
save()
print(‘–> activating changes’)
activate()
print(‘–> done’)
#
# update the deployment plan
#
print(‘–> about to update the deployment plan for the DbAdapter’)
startEdit()
planPath = get(‘/AppDeployments/DbAdapter/PlanPath’)
appPath = get(‘/AppDeployments/DbAdapter/SourcePath’)
print(‘–> Using plan ‘ + planPath)
plan = loadApplication(appPath, planPath)
print(‘–> adding variables to plan’)
makeDeploymentPlanVariable(plan, ‘ConnectionInstance_eis/DB/’ + dsName + ‘_JNDIName_’ + uniqueString, eisName, ‘/weblogic-connector/outbound-resource-adapter/connection-definition-group/[connection-factory-interface=”javax.resource.cci.ConnectionFactory”]/connection-instance/[jndi-name=”‘ + eisName + ‘”]/jndi-name’)
makeDeploymentPlanVariable(plan, ‘ConfigProperty_xADataSourceName_Value_’ + uniqueString, eisName, ‘/weblogic-connector/outbound-resource-adapter/connection-definition-group/[connection-factory-interface=”javax.resource.cci.ConnectionFactory”]/connection-instance/[jndi-name=”‘ + eisName + ‘”]/connection-properties/properties/property/[name=”xADataSourceName”]/value’)
print(‘–> saving plan’)
plan.save();
save();
print(‘–> activating changes’)
activate(block=’true’);
cd(‘/AppDeployments/DbAdapter/Targets’);
print(‘–> redeploying the DbAdapter’)
redeploy(appName, planPath, targets=cmo.getTargets());
print(‘–> done’)
except:
print(‘–> something went wrong, bailing out’)
stopEdit(‘y’)
raise SystemExit
#
# disconnect from the admin server
#
print(‘–> disconnecting from admin server now’)
disconnect()
#
# this is the main entry point
#
main()
To use this script, we need to edit the parameters at the top of the program.
save it somewhere in the server location(cd /your/fmwhome/wlserver/server/bin/) with name like “createMyDS.py”
Set the domain environment by running the below command.
cd /your/fmwhome/wlserver/server/bin/> setDomainEnv.cmd
Now run the python script with below command.
/your/fmwhome/wlserver/server/bin/>  java weblogic.WLST createMyDS.py
Now if you open your weblogic console you will find both DS and DB adapter configured with above values.
wlstdswlstdb1